
Zulu War Collection
"The Zulu War: A Glimpse into the Heroic Battles and Brave Defenses" Step back in time to the tumultuous era of 1879


All Professionally Made to Order for Quick Shipping
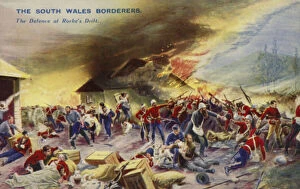
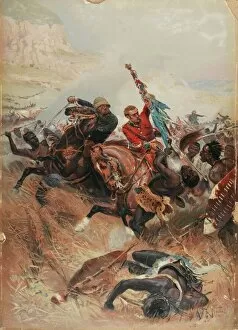
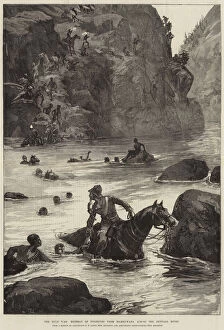
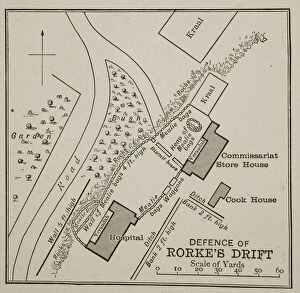
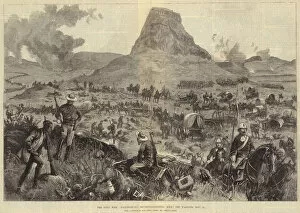
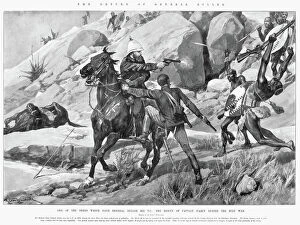
"The Zulu War: A Glimpse into the Heroic Battles and Brave Defenses" Step back in time to the tumultuous era of 1879, as we delve into the gripping events of the Zulu War. The South Wales Borderers stand tall at the Defence of Rorkes Drift, their unwavering determination etched on their faces. In a vibrant lithograph, Lieutenants Melville and Coghill emerge as saviors, valiantly saving the Colours amidst chaos. Witness history unfold through engravings capturing pivotal moments like the Retreat of Fugitives from Isanhlwana across Buffalo River. Immerse yourself in another scene where Lieutenant Melvill clung to a stone at Fugitives Drift, his resilience echoing through time. The defense and relief of Rorkes Drift remain iconic symbols of bravery etched forever in our collective memory. British soldiers fought with unwavering courage against all odds during this fierce conflict. Explore line engravings that depict their heroic efforts during these crucial battles. Destruction loomed over Dabulamanzis Kraal as depicted in an evocative engraving - a stark reminder of the devastating impact war can have on communities caught in its crosshairs. Witness Major Dartnell's Natal Mounted Police marching resolutely towards the frontlines; their steely determination evident even from afar. Discover an engraving showcasing "the Laager Method of Defense, " revealing strategic tactics employed by those facing relentless attacks. The gallant defense led by Lieutenants Chard and Bromhead alongside one hundred thirty-seven men at Rorkes Drift is immortalized forever within these pages. Black-and-white photographs transport us directly to historic sites such as Rorkes Drift with Isandlwana hauntingly visible in the distance or Post at Rorkes Drift with Signal Hill standing sentinel-like nearby.